
Table of contents

Android application development
20 July 2020
Reading time: 15 minutes
Android is an open source and Linux operating system for mobile devices such as smartphones and tablet computers. Android was developed by the Open Handset Alliance, led by Google and others.
Android supports hundreds of millions of mobile devices in over 190 countries. It is the largest used mobile platform and is growing rapidly. More than 1 million new Android devices are activated every day around the world.
Android apps can be written using languages such as Kotlin, Java and C++.
Once developed, the app can be easily packaged and sold through stores such as Google Play, SlideME, Opera Mobile Store, Mobango, F-droid and Amazon Appstore.
Each android app has its own security environment, for this the following Android security features are used:
By default, the system assigns a unique user ID to each application. The system sets permissions for all files in an app so that only the user ID assigned to that app can access them.
Each process has its own virtual machine (VM), so application code runs in isolation from other applications.
By default, each application runs in its own Linux process. The Android system starts a process when any component of an application needs to be executed, and then terminates the process when it is no longer needed or when the system needs to reclaim memory for other applications.
The Android system implements the principle of least privilege. That is, each application, by default, has access only to those components that it needs to do its job. This creates a very secure environment where an application cannot access parts of the system for which permission has not been given. However, there are ways for an app to share data with other apps and to access system services:
It is possible for two applications to share the same Linux user ID, in which case they can access each other's files. To save system resources, applications using the same user ID can also arrange to run in the same Linux process and share the same virtual machine. Then the applications must also be signed with the same certificate.
An app can ask permission to access device data such as location, camera, or Bluetooth. The user has to explicitly grant these permissions.
Tools
You can start developing your Android app on any of the following operating systems:
- Microsoft Windows 10 or later.
- Mac OS X 10.5.8 or later with an Intel chip.
- Linux including GNU C Library 2.7 or newer.
All the necessary tools for developing Android applications are freely available and can be downloaded from the Internet. Below is a list of the software you will need.
- Java JDK5 or later
- Android Studio
- Android SDK
To begin with, we will get acquainted with the components of the application and move on to a detailed analysis of the application development environment.
Constituent Android app
The Android operating system is a stack of software components roughly divided into five sections and four main levels:
Linux Kernel, provides an abstraction layer between device hardware and contains all necessary hardware drivers such as camera, keyboard, display, etc. In addition, the kernel handles networking and wide a range of device drivers that facilitate interaction with peripheral equipment.
Libraries. In addition to the Linux kernel, there is a set of libraries, including the open source WebKit engine, the well-known libc library, the SQLite database, which is a useful repository for storing and sharing application data, libraries for playing and recording audio and video, SSL libraries responsible for Internet security, etc.
Android Libraries. This category covers those Java-based libraries that are specific to Android development. Examples of libraries in this category include application framework libraries in addition to those that facilitate user interface creation, graphics drawing, and database access.
The following is a summary of some of the core Android libraries available to the Android developer:
- Android.app - provides access to the application model and is the cornerstone of all Android applications.
- Android.content - Facilitates content access, publishing, and messaging between apps and app components.
- Android.database - used to access data published by content providers and includes SQLite database management classes.
- Android.opengl - Java interface to the OpenGL ES 3D rendering API.
- Android.os - Gives applications access to standard operating system services, including messages, system services, and inter-process communication.
- Android.text - used to render and manipulate text on the device's display.
- Android.view - The basic building blocks of application user interfaces.
- Android.widget - A rich collection of prebuilt UI components such as buttons, labels, lists, layout managers, radio buttons, etc.
- Android.webkit is a set of classes designed to enable web browsing in applications.
Having looked at the core Java-based libraries, it's time to turn our attention to the C/C++-based libraries.
Android Runtime
This section introduces a key component called the Dalvik Virtual Machine, which is a variation of the Java Virtual Machine specifically designed and optimized for Android.
- The Dalvik virtual machine uses core Linux features such as memory management and multithreading that are native to the Java language.
- The Dalvik Virtual Machine allows each Android application to run in its own process with its own instance of the Dalvik Virtual Machine.
The Android development environment also provides a set of core libraries that allow application developers to write applications using the standard Java programming language.
Application Platform
Application Framework provides many high-level services to applications in the form of Java classes. Application developers can use these services in their applications.
The Android platform includes the following key services:
- Activity Manager - controls all aspects of the application lifecycle and activity stack.
- Content Providers - allows applications to publish and share data with other applications.
- Resource Manager - Provides access to built-in non-code resources such as strings, color settings, and UI layouts.
- Notification manager - allows applications to display alerts and notifications to the user.
- View system is an extensible set of views used to create application user interfaces.
Step by step development
To create an Android app using Android Studio, follow these steps:
In the Android Studio Welcome window, click the Create New Android Studio Project button.
If you already have a project open, choose File > New >> new project >>.
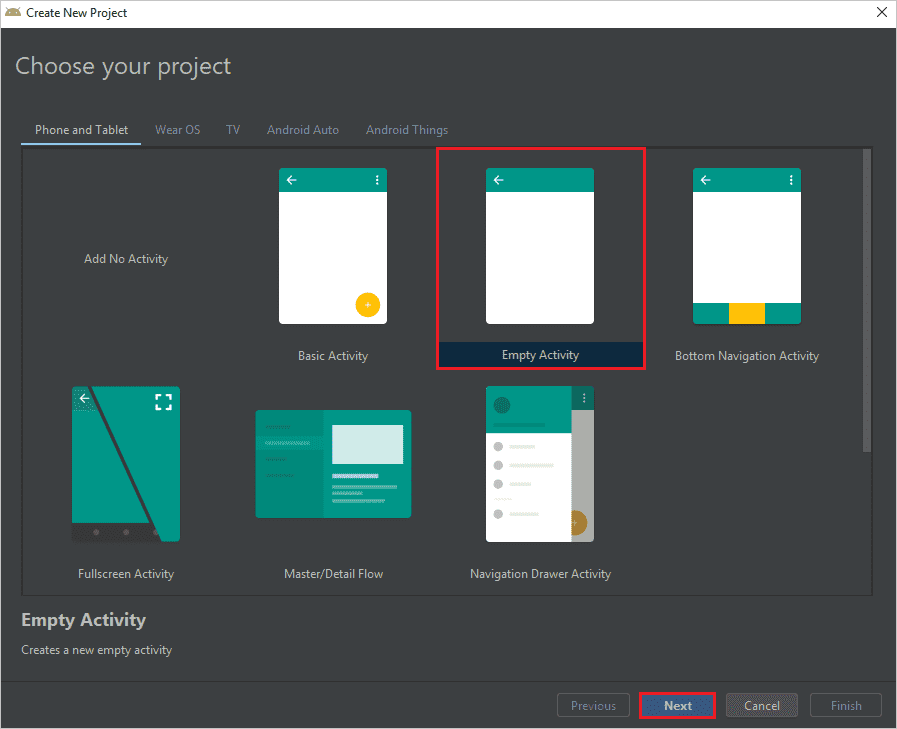
In the project template selection window, select one of the templates and click next.
In the Project Setup window, do the following:
- Enter the name of your application in the Name field.
- Enter "com.name.myfirstapp " in the package name field.
- If you want to place the project in a different folder, change its save location.
- Select either Java or Kotlin language from the drop down menu.
- Select the lowest Android version your app will support in the SDK field.
- If your application needs support for a legacy library, check the "Use legacy android" option. Library checkbox support.
The lower the Android version, the more devices the app will run on. The higher the version, the richer the API functionality.
- Leave other fields as default.
- Click the done button.
After some processing time, the main window of Android Studio will appear.
Now take a moment to review your most important files.
First, make sure your created project window is open (select View > Tool Windows > > Project>>) is selected from the drop-down list at the top of this window. Then you can watch the following files:
- app > java > > com.example.myfirstapp > MainActivity
This is the main process. This is the entry point for your application. When you create and run your application, the system starts an instance of this Activity and loads its layout.
- app > res > > layout >>> activity_main.XML
This XML file defines the layout for the activity's user interface (UI).
- application > manifests > > AndroidManifest.XML
The manifest file describes the following: the main characteristics of the application and defines each of its components.
- Gradle Scripts > build.grab
There are two files with this name: one for the project, "Project: My First App", and one for the application module. Each module has its own build.gradle file, but this project currently only has one module. Use each module's build.file to control how the Gradle plugin builds your app.
Running the application on a real device and an emulator
Set up your device as follows:
Connect your device to your development device with a USB cable. If you are a Windows developer, you may need to install the appropriate USB driver for your device.
Follow these steps to enable USB Debugging in Developer Options:
- Open the Settings app.
- If your device is running Android version 8.0 or later, select System. Otherwise, continue to the next step.
- Scroll down and select About phone.
- Scroll to the bottom of the page and click Build number seven times.
- Return to the previous screen, scroll to the bottom and tap Developer Options.
- In the Developer Options window, scroll down to find and enable USB Debugging.
Launch the app on your device like this:
- In Android Studio, select your app in the run/debug configurations drop down menu on the toolbar.
- On the toolbar, select the device on which you want to run your app.
- Device target drop-down menu.
- Press the Execute Button.
Android Studio will install your app on the connected device and run it. You are now viewing the display in the app on your device.
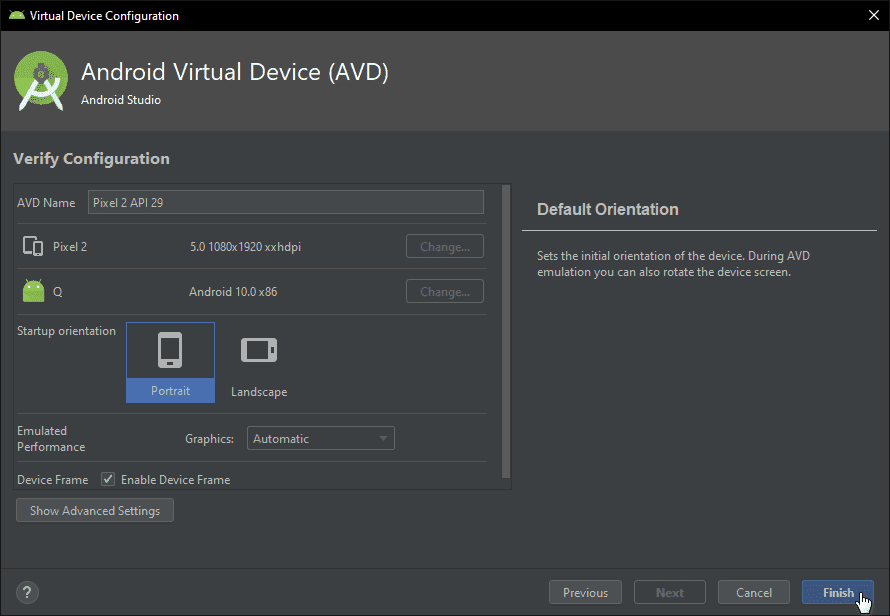
Run on emulator
Run the application on the emulator as follows:
- In Android Studio, create an Android Virtual Device (AVD) that the emulator can use to install and run your app.
- On the toolbar, select the application from the run/debug configuration drop-down menu.
- From the target device drop-down menu, select the AVD you want to run your enabled app.
- Device target drop-down menu.
- Press the Execute Button.
Android Studio installs the app on the AVD and launches the emulator.
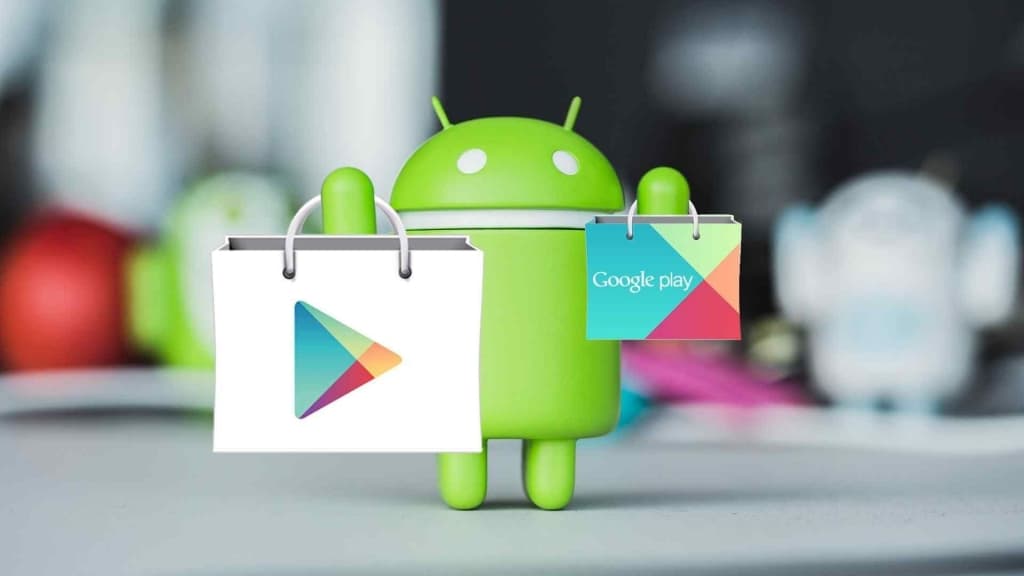
App placement on Google Play
An efficient way to distribute apps on the Android platform is by hosting them on the Google Play marketplace. The Google App Store is installed on almost all Android devices, except for a number of certain models, and by default, on all these devices, the option to install applications only from this site is enabled.
These factors give the following features of Google Play:
- huge and growing user base
- handy publishing tools;
- quick application review form (the application will be available in a couple of hours).
Let's consider the process of placing an application on Google Play.
- Before downloading the application, you must register a developer account on Google Play.
- The next step to publish the application is to log into the developer account and click "New Application", after which you will be taken to the developer console. Where it will be necessary to fill out all the forms.
When filling out various forms before publishing an application, you can choose the type and description of your application (category, audience age restrictions, etc.), languages and countries of distribution, price in each of the countries. You also need to select images with the application, screens of this application, create captions and do a number of other things.
To fill out the form with application versions, you need to prepare a release version of your application.
How to prepare the release version of the application:
You've created an Android app, and now you need to follow these steps to share it:
- Prepare application signature. The application is signed with a unique cryptographic key.
- Prepare application icon.
- Prepare screenshots (screen shots) of the application. You can separately prepare screenshots for tablets, TV and other devices.
- Check the application manifest. The rights, the version of the application are checked. The SDK versions are checked for which the application is being prepared. Application logging is removed. Application resources are checked.
- Build a release version of the project and sign it with a unique key.
- Prepare remote servers if the application works with such servers.
- Test the release versions of the signed application.
- After the release of the application in the store, it is advisable to download and test the application yourself.
In just a few simple steps, your app is on the shelves of the store.
Conclusion
Creating your first Android application and its release on the Google Play store platform, you do not finish at all, but only begin your acquaintance with Android programming. If you need professional help and development of an Android-based application, please contact the Crocoapps studio, our team will gladly please you.